|
Need to cut a big hole, the easy way? How frequently do you have to cut a hole far bigger than the biggest drill in your tool compartment? When that occurs, your simplest alternative is to get your drill and a hole saw. Utilize a bimetal hole saw to cut wood and different materials Trade A-Cutting edge has one of the broadest hole saw projects in the business in both utilization and sizes. However, here we are going to discuss bimetal hole saws. 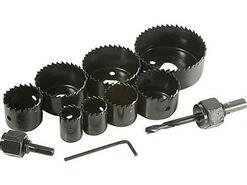 Bimetal hole saws are intended to cut everything from wood and plastics to ferrous and non-ferrous metals, including tempered steel. These are the workhorses of the hole saw family and are accessible in up to 39 sizes from ¾" to 7 ⅞". Although they are slower cutting than carbide hole saws they give a much smoother wrap up.
About bimetal hole saws A bimetal hole saw comprises of an extremely hard, high-speed steel band, which is welded onto a high carbon steel body and a thick, high carbon steel backplate. The high-speed steel band is ground to a 4/6 tooth arrangement and the teeth are "set" to give sufficient side leeway. The side leeway enables the body of the metal hole saw to go through the material without binding and influences the measure of room between adjoining teeth and the measure of material every tooth clears. The 4/6 tooth design or "pitch" shifts back and forth somewhere in the range of 4 and 6 TPI, or teeth per inch, around the body of the saw. This variable pitch upgrades cutting by permitting increasingly effective waste expulsion and decreasing warmth development and vibration. Cutting edges, for the most part, comprise of saw like, bimetal teeth, which are "set" to give side freedom, or bigger carbide teeth for quick cutting, or jewel coarseness cutting edges for earthenware and tile items. For best outcomes and wellbeing, utilize a hole saw intended to cut the current material and utilize the suitable cutting speed and lubricant. Is a cooling lubricant required when cutting with a hole saw? It is basic that water is utilized as a cooling lubricant when cutting with any precious stone coarseness hole saw. Inability to do will lessen the life of the hole saw significantly. While no lubricant is required when cutting holes in wood items, cutting oil will help broaden hole saw life when cutting an expansive number of holes in ferrous and non-ferrous metals. Check your hole saw cutting speed for the best outcomes Speed executes, and this unquestionably remains constant for hole saws. Two tenets to recall are:
Clear chips and waste while utilizing your hole saw When cutting thicker material, make sure to clear chips and waste material from the hole. Cutting speed might be decreased and warmth will develop by chips and waste material working up at the base of the sharp edge and between the necks. While cutting the hole, utilizing a slight all over movement will help remove abundance waste material. If this doesn't work, occasionally quit cutting, remove the hole saw and clear the waste material. This will speed up the cutting, lessen heat development and help broaden the life of your hole saw.
0 Comments
We have as of late had different inquiries with respect to which pans ought to be utilized to heat, meal, toast, and cook. To comprehend the secret between baking sheets, jelly roll pans, treat sheets, and the various varieties of names used to identify these cooking vessels, we took a top to bottom take a gander at the different uses, upkeep rules, and specialized clarifications to differentiate between the immense range of sheet pans. 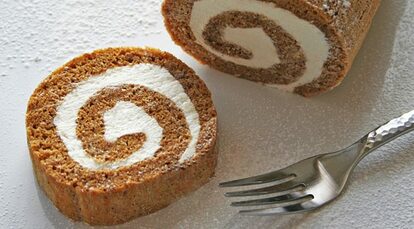 The baking sheet
This kitchen thing is utilized specifically to prepare. Ordinarily free of any particular sides, but may incorporate a little lip or two. As the name proposes, it is a level sheet of metal expected for baking. The edgeless plan gives an unhampered surface that is incredible for moving a spatula around while gathering up cookies and furthermore takes into consideration even wind current to all parts of the baking item. For items that may run or depend on a vessel in shape, we don't prescribe utilizing a baking sheet. Sorts of baking sheets Protected Baking Sheets: These pans are built specifically for fragile heated goods. The term protected is utilized in light of the fact that the pan has an airy take between the two sheets of metal it is made out of. They are regularly found with a solitary lip for simply taking care of. If you are searching for a dark-colored edge or fresh completion, these pans are not perfect. With these pans, you may need to alter the cooking time to oblige for a slower cooling rate. Best for: Shortbread cookies, meringues, sugar cookies, or spritz cookies Nonstick Baking Sheets: The nonstick pan has turned into a staple in many home kitchens in the course of recent decades. A most loved for brisk cooking, simple evacuation of prepared foods, and a speedy tidy up, these pans are perfect for baking several groups of cookies in record time. The darker surface of your nonstick pan may cause consuming on the bottoms of your cookies, so be cognizant while your things are baking. Best for: Any treat you wish to darker or fresh French Dark Steel Baking Sheets: French dark steel is a substantial, old-world variant of the advanced, aluminum baking sheets. These pans require normal flavoring which can be cultivated by scouring genuine salt into the surface to prevent erosion. Also, make certain to store these sheets in a dry space to abstain from rusting. These pans give even sautéing but can set aside a touch of opportunity to change in accordance with. If you discover you are overcooking, diminish the warmth or time in the broiler and make sure to take note of the temperature modification on your formula for some time later. Best for: Palmers, puff baked good, pizza, potato wedges, fries, or for warming bread Aluminum Baking Sheets: Utilized in numerous business kitchens, aluminum baking sheets come in several checks and sizes. These sheets are useful when cooking different punches and are known for directing warmth evenly and proficiently. In view of the aluminum makeup, these pans can exchange a metal-like flavor to a few sustenance’s, so play it safe and use material paper or a nonstick baking mat. Best for: Cookies made without citrus or acidic fixings The sheet pan This kitchen workhorse passes by numerous names but is anything but difficult to identify by its full edge plan. Some of the time alluded to as a large jelly roll pan, baking pan, baking sheet with rolled edges, or rimmed baking sheet, it has even a bigger number of users than names. These pans are extraordinary for cooking, baking, sealing, searing, and even going about as a help or trickle plate for different goods in the stove. Sheet Pan Sizes: Despite the fact that you can discover these pans in an assortment of sizes, the standard sizes are full, half, and quarter estimate.
Aluminum Sheet Pans: Aluminum sheet pans are the standard in most expert kitchens. They arrive in an assortment of measures, which ought to be noted when buying aluminum pans for your home or business. The lower the number, the thicker your pan will be. For instance, a 13-measure pan will be thicker than an 18-check pan. This is especially vital if you are worried about twisting your pans or have had issues with distorting before. The thicker your pan, the more uncertain, it is to twist. Best for Baking non-acidic heated goods, cooking with cooling racks set inside, broiling, selling prepared goods, and incredible for getting spills from different vessels. Steel Sheet Pans: Steel sheet pans are perfect for those worried about a metal flavor exchange from aluminum. They are marginally more exorbitant than the conservative aluminum sheet pans and they don't lead heat as evenly as the aluminum sheet pans. These are adequate for cooking, searing, or sealing but are not exhorted for exact baking. Sheet pans are also accessible in aluminized steel for better conduction of warmth. Best for: Baking healthy cookies, searing with cooling racks set inside, broiling, selling prepared goods, and incredible for getting spills from different vessels. Hope so you people are properly understood our guidelines and you can do this at your home by yourself. Thank you so much for staying with me. Introducing your water dispenser is a generally straightforward undertaking that most of purchasers ought to almost certainly achieve. It's suggested that you adhere to the establishment directions that accompanied your unit, but on the off chance that you don't approach your manual, we have recorded some broad guidelines down beneath. 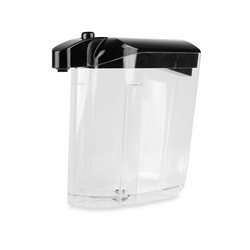 Introducing a Point-of-Use Dispenser:
In the first place, place the unit on a dimensional surface in a zone, no less than 4 creeps on the sides and back, with appropriate ventilation, keeping up temperatures above solidifying.
Introducing a Bottled Water Cooler:
Water Cooler Cleaning and Maintenance There are numerous approaches to ensure that your cooler or dispenser stays clean and working legitimately. The best and most essential approach to do this is by cleaning the cold reservoir and water lines every 3 months. Here's how to do only that:
Mixing bowls are an essential piece of any kitchen. Due to their wide overflows, major errands like making plates of mixed greens, mixing the batter and splashing beans are effectively practiced with them. A lot of three is useful first off, but picking among glass and stainless steel is a choice that could hold you up in the housewares walkway when shopping. There are favorable circumstances and burdens to both, but if security is a need for you, run with stainless steel. 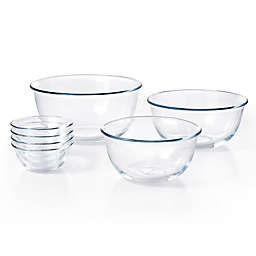 Cost and Feel
Although you can locate any sort of mixing bowl in any value extend, stainless mixing bowls are typically more affordable than glass. The cheapest, sold at rebate stores or surplus outlets, are sometimes under $10 a set. But if money isn't your inspiration, you may pick higher-end stainless bowls made of good-quality metal with elastic grasps on the base. Conversely, glass mixing bowls more often than not cost about equivalent to higher-end stainless, but can be utilized to serve food just as blend it. You may lean toward glass bowls since they look better in the cupboard and on the table. Down to earth Employments Glass and best stainless steel mixing bowls may have a similar capacity, but they handle differently. Glass is heavier, so emptying fixings from the bowl into another vessel is more testing than with stainless. There can also be an issue with wellbeing: Even the most grounded, most sturdy glass bowls can be chipped or broken in some conditions. Stainless, however, is chip-and split verification. Glass can wind up scratched and recolored and go up against a foggy film with age. Stainless bowls may endure a couple of gouges, but they last inconclusively and never lose their sparkle. Valuable Highlights You can purchase glass and stainless bowls set apart with estimating lines that assistance you pursue a formula. If this component is vital, run with glass: You can see the different dimensions through the bowl and can hold it up to quantify all the more precisely. You can also put a glass bowl into a microwave to warm butter or chocolate. With stainless, you can't do this. A last consideration: A stainless bowl and a wooden spoon can possess a little child while you're cooking, but a glass bowl must be kept distant. Here we attempt to examine among glass and stainless steel mixing bowls. Expectation so every one of you comprehends this theme and know which one is the best for you. I think both are helpful in their own place. Presently individuals can take one of these which one is impeccable to them. I also believe it absolutely relies upon individuals decision. At long last, thank you such a great amount for remaining with me. Expectation so this article will be useful to you for picking the correct one as you need for you. At the point when the water pressure at a solitary faucet is low, the arrangement is often exceptional basic. Toward the finish of the faucet gush, there is typically a screw-on screen fitting, known as the aerator. Strikingly, numerous individuals don't even realize this fitting is there and often consider a handyman to make a fix that is as simple as anything a property holder will ever confront. 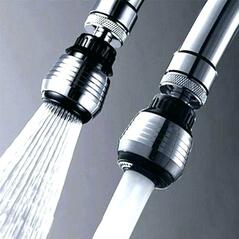 The motivation behind the aerator is to separate the strong stream of water and add air to the water flow. These faucet aerators often get clogged with developing and need to be cleaned to permit legitimate water flow. This is an incessant issue in regions where there is an overwhelming mineral substance to the water supply, for example, is often the situation in rustic territories served by groundwater wells.
Much of the time, basic cleaning of this aerator will work, however, at times, you may need to replace it. In either case, you should remove the aerator. For the most part, the aerator is in a bad way on hand-tight and can be unscrewed and removed effectively. In different cases, however, the development of mineral stores may solidify up the aerator and make it difficult to remove. What You Need
Instructions to Remove the Aerator Begin by endeavoring to unscrew it with your hand. Most faucet aerators are hand tight and commonly you can unscrew it by simply utilizing your hand. Make a point to get dry both the faucet and your hands first. If that does not work you will need to utilize a couple of pliers. If the aerator is in great condition and won't be replaced then you can utilize a cloth between the aerator and the pliers to prevent scratching. Or on the other hand, you can put masking tape on the jaws of your pliers to secure the chrome completion of the faucet aerator. A little pair of channel-type pliers works best for this. With the pliers, cautiously attempt and divert the counterclockwise as saw from the base turning upward. (If you are looking down at the faucet, you will turn it clockwise.) It does not move, take a stab at moving the pliers a quarter turn and cautiously take a stab at diverting the aerator from that point. Continue doing this forward and backward from the two positions. Try not to grasp the aerator too firmly, in light of the fact that the metal is delicate and will twist effectively, making your activity even more enthusiastically. If you are experiencing difficulty, you can have a go at showering entering oil, (for example, WD-40) on the strings and let it sit for some time before attempting once more. When introducing or reinstalling the aerator, screw it on simply hand tight at first. Test the faucet, and if it spills around the aerator, at that point fix it slightly further with channel-type pliers, making a point to utilize a cloth or masking tape to ensure the chrome of the aerator. Expectation so you individuals like this article and furthermore take in something from here about in what capacity can remove faucet aerators. You can use kohler faucet aerator for doing your job with hassle free. I can't do casual discussion today, and I am mere too eager to impart the present recipe to you. It's another method for eating my darling pancakes!! Since I made these on Saturday, I have thought of several different ways of making these awful young men! My brain is turning, goodness I can't hold on to attempt them and afterward share them with you!! Kindly don't consider different me since I'm nourishment insane! 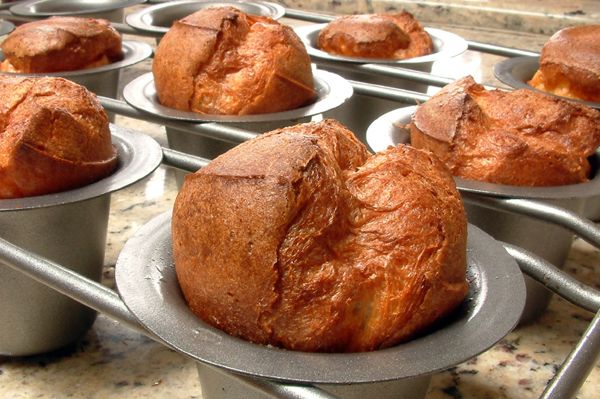 Is it true that he isn't charming? I adore this thought, and it would be so ideal for making for Mother on Mother's Day! The recipe is soooo simple!!! Everything I did is switch up my pancake recipe a bit, took my pancake batter and place it in the blender until smooth. Fill a muffin pan and baked in the oven for 11 minutes and pop! The popovers were conceived!
Truly, would you be able to see them being served on a plate? I would be excited if my family made these for me! I am excited to make these for me!! They're so sweet that I didn't even need to put maple syrup on them. I took somewhat greek yogurt, vanilla, and cinnamon and made the fixing for my berries. If you have vanilla yogurt that would work as well, simply sprinkle with a little cinnamon. Since I made additional, the following day I warmed one in the microwave for 15 seconds, finished with berries and yogurt. I didn't even waste time with a fork. You can eat them simply like a muffin, but be watchful a blueberry my fall. Presently obviously if you finished yours with maple syrup, I suggest eating it with a fork. Presently these little folks may not look filling but rather trust me they are! The serving size is 3 Pancake Popovers each! There a solid little popover, loaded up with fiber and protein, which will keep you full for quite a long time! Ingredients
Topping:
Expectation so you guys are eager to give this a shot at your home. I think you and your family members love to eat this. Popover cups can help you to get different shape's berry popover pancakes. Coffee and camping go connected at the hip. For me, coffee is an everyday custom, and camping without a hand-warming, steaming cup of java doesn't appear to be correct. If you need the intense smell of splendidly simmered coffee to float over your campground before anything else, utilize these tips to make your superbly brewed cup with a camping percolator. 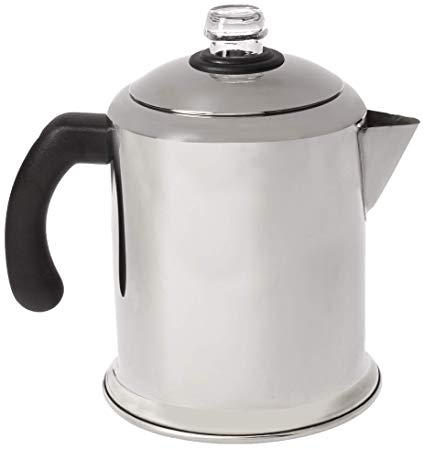 Begin with the correct percolator.
COFFEE POT 8 CUP-BLUE from GSI Outside You may not know it but rather you've seen a best electric coffee percolator before. Like the picture, these old school but valuable instruments have been a piece of American iconography since 1880. Frequently observed brewing over a flame while a cattle rustler plays his harmonica, new styles and sizes are accessible because of camping and coffee tech headways. Since space and weight are a worry when camping or exploring, remember those criteria when making your determination. What are every one of these parts? Hardened Steel Percolator Coffee Pot from Wayfair When you first utilize the percolator, every one of the parts may be a bit of befuddling. In contrast to gadgets, these infants don't accompany confounding guidelines in Taiwanese, or any directions so far as that is concerned. Here is a brisk kept running down of the parts. The percolator comprises of a pot and a vertical tube (with stand) that leads from the base to the highest point of the percolator. The basket sitting on the tube is a perforated chamber with cover. The tube and basket rest inside the pot. When assembling, ensure that the highest point of the tube and the unmistakable "bubble spot" line up. The "bubble spot", as I call it, is the place the bubbling liquid will ascend through the tube, sprinkling against within. This is the way you can tell if the pot is brewing. 1– 2– 3– 4 Camping Coffee! When you have the parts down, the real brewing is very simple. Adhere to the well-ordered directions beneath or watch the video. Either will get you to that intense smell of superbly simmered coffee drifting over your campground before anything else. 1) Fill the pot This may be two or three cups or the entire thing. Don't over fill or you'll have a chaotic situation staring you in the face. My percolator has a "fill line" within which is a convenient guide. 2) Include coffee If you are utilizing customary ground coffee, you'll have to purchase channels that accommodated your basket. However, if you utilize new coarsely ground coffee, you numerous not require a channel. This is the place trying out your percolator will be required. It took me a few times to make sense of the traps specific to my percolator. When you've made sense of the basket needs, include your ideal sum. I for the most part run with one tablespoon for every two cups of coffee and afterward include an additional tablespoon for the pot. Next, put the basket cover on and place the entire tube and basket gathering into the pot. 3) A watched pot boils Spot the pot on a stove or mesh over a flame and watch it bubble. It may take a short time if you do it over a flame, but it is critical to screen the procedure. If you are utilizing a camping stove, keep the fire at medium quality. You can't leave like drip coffee makers. After a short time it will begin to bubble. You'll know in light of the fact that the water will start to permeate to the best and you'll see it through the "bubble spot". When that begins to occur, modify the fire down on the stove or move it off the focal point of the flame. Give it a chance to keep on permeating for 10– 15 minutes. As it does this, the shade of the water in the "bubble spot" will keep on obscuring. 4) Pour and appreciate At long last, present yourself with a cup and appreciate. Take in the magnificence of nature with a cup in your grasp to battle off the chill of those astonishing mountain mornings. Look no further on the grounds that a steaming heap of flawlessly delicate, best fluffy pancakes are directly here! Ends of the week will never be the equivalent again. (No buttermilk required.) Basic. EASY. Fast. FLUFFY. The Best Fluffy Pancakes recipe you will begin to look all starry eyed at. Loaded with tips and traps to enable you to make the best pancakes… ever! 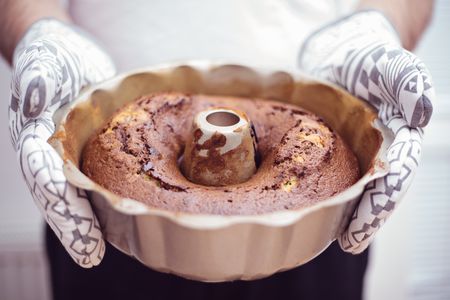 No come up short end of the week pancake recipe
Every single Sunday starts with pancakes… and closures with extra pancakes from the morning. These are everything you need in a pancake. They're delicate thus fluffy… every sizable chunk softens in your mouth… you'll be going after more than one. Stack. Conceivably. Step by step instructions to make the best fluffy pancakes Everything begins with the batter. Excessively thick and they will be glugs and half-cooked within. Excessively runny, and the pancakes will spread out and won't lighten up. I like to test the batter with my spoon or scoop, lifting it delicately over the edge of the bowl. It must be thick BUT ready to run gradually and pleasantly off of the spoon. A few knots is alright, but I do jump at the chance to smooth out my batter as much as I can tenderly with a wire whisk. Instructions to cook immaculate pancakes Preheat your great quality, nonstick container or frying pan on medium heat first. When it's hot, drop the heat down to low-medium heat. Hold up around two minutes. This part is urgent thus justified, despite all the trouble. Softly oil the container with a little measure of butter (truly, even on nonstick dish), and wipe away any abundance butter with a sheet of paper towel. Utilize a 1/4 cup estimating cup to pour your batter so you get flawless, evenly measured pancakes. Begin pouring from the center, at that point keep pouring gradually in a roundabout movement with the goal that the batter spreads into immaculate round shapes. Enable the pancakes to cook legitimately! Try not to surge them on high heat, or flip them too soon. Give that under-side a chance to cook to a beautiful brilliant darker shading, and when bubbles begin shaping to finish everything and around the surface (batter side), they are prepared to flip. How to get that flip culminated without making unbalanced pancakes? Snatch a decent, plastic spatula and slide it underneath the pancake. Utilize your WRIST to tenderly flip them as opposed to utilizing your whole arm. You'll recognize what I mean when you're before your container prepared to flip. THIS makes an Enormous difference. Ingredients 2 cups universally handy | plain flour 1/4 cup granulated sugar or sugar 4 teaspoons heating powder 1/4 teaspoon heating soft drink 1/2 teaspoon salt 1/2 cups milk (in addition to up to 1/4 cup additional if required) 1/4 cup butter, liquefied 2 teaspoons unadulterated vanilla concentrate 1 extensive egg Directions Consolidate together the flour, sugar (or sugar), heating powder, preparing soft drink and salt in an expansive measured bowl. Make a well in the middle and include the milk, somewhat cooled softened butter, vanilla and egg. Utilize a wire speed to whisk the wet fixings together first before gradually collapsing them into the dry fixings. Mix together until smooth (there might be a few protuberances but that is alright). (The batter will be thick and rich in consistency. If you discover the batter excessively thick - doesn't spill off the scoop or out of the estimating cup easily - crease a few tablespoons of additional milk into the batter at any given moment until achieving wanted consistency). Put the batter aside and permit to rest while heating up your skillet or frying pan. Heat a nonstick skillet or iron over low-medium heat and wipe over with a little butter to delicately oil container. Pour ¼ cup of batter onto the dish and spread out delicately into a round shape with the back of your scoop or estimating cup. At the point when the underside is brilliant and bubbles start to show up superficially, flip with a spatula and cook until brilliant. Rehash with residual batter. Present with nectar, maple syrup, natural product, dessert or solidified yogurt, or appreciate plain! We are giving you some cake pan reviews. These will be helpful for choosing the right one for your kitchen. Once in a while, we put down our very own blades and get welcome to other individuals' homes for supper. We want to see the traps and procedures our companions utilize in their own kitchens, so are constantly quick to stay nearby the cooking space and look at things. Lamentably, we've seen an irritating pattern: some of you all are endeavoring to disrupt yourselves with your cutting boards. 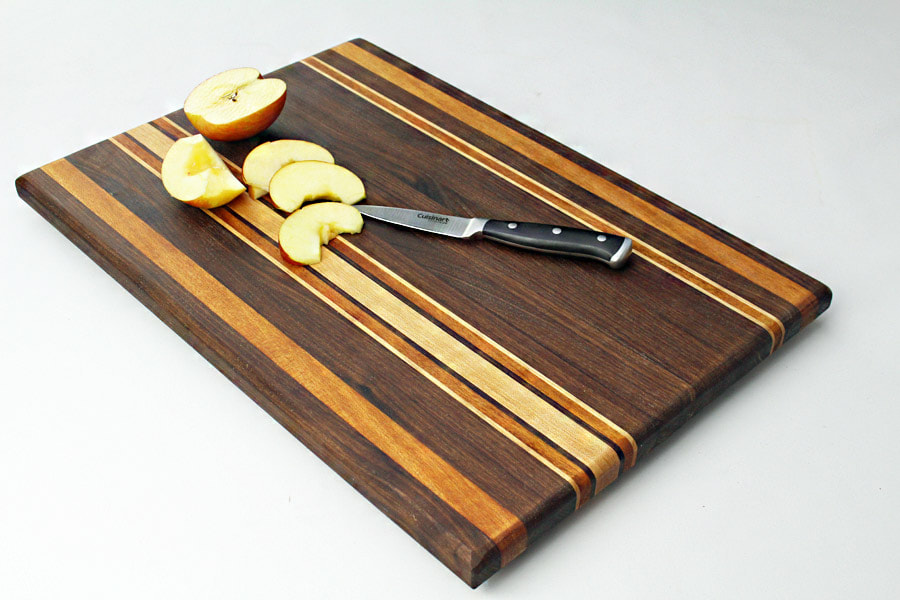 There are a couple of vital hints and traps we've grabbed end route that we trust you folks will yell out into the universe. If we as a whole utilize the best cutting board for the activity, in the right shape, on the right surface, our cooking will go from incredible to fantastic. Also, you'll be more quiet, less inclined to cut yourself, have a lot of room and make sure you're never cross-defiling any of your fixings. Doesn't that seem like a significantly less unpleasant cooking knowledge? We suspect as much as well!
1. Put a soggy towel under your cutting board to shield it from slipping If you accept one recommendation far from this article, let it be this one. We are perplexed by the quantity of individuals who don't do this. Giving your cutting board a strong surface to lay on shields you from the cutting board slipping out from underneath the weight of your hacking. Cutting board slips lead to cutting board mishaps, which nobody needs. We like to crease a soggy kitchen material into equal parts and just set our wooden cutting board to finish everything. It makes us feel additional protected, which makes our knife abilities additional exact. See these? At the point when that plastic meets your ledge, each ounce of weight you apply while hacking will ask the plastic to slide right out from under your knife, putting your hands in mischief's direction. The towel trap will expand your certainty and change your kitchen life. We guarantee. 2. Ensure your cutting board is sufficiently enormous to get the activity done These small plastic cutting boards that we as a whole have buried in a bureau are useful for a couple of unmistakable things - cutting citrus for beverages, preparing a speedy enhancement finally, dicing up bacon to hurl into a dish (since you never need to put crude bacon on the cutting board you're utilizing for everything else). A modest cutting board is no place for dicing an onion, cutting meat, or extremely any genuine cooking prep whatsoever. In this equivalent vein, avoid strangely molded cutting boards. The more surface region you have, the more control you have over your knife aptitudes and the more sorted out you can be. 3. Utilize the right material for the activity For 75 percent of your slashing needs, a large, tough wooden or bamboo cutting board is the most perfectly awesome. It doesn't dull your blades as fast as plastic, it remains set up well and foods won't slip on its surface. You ought to also make sure to have a durable plastic cutting board close by for preparing meat and fish. Plastic is superior to wood for these sorts of foods, since microscopic organisms from crude meat and seafood can get caught in the grain of the wood and make you wiped out. Since plastic is non-permeable, when you wash the surface of these boards, they get completely cleaned for next time. These are the main two sorts of cutting boards your kitchen needs. Don't, we rehash, don't utilize a glass cutting board for anything besides a serving platter. Whoever thought of this thought was befuddled. Pizza cutters are incredible apparatuses to cut pizza into slices, but they can be utilized to cut an assortment of different nourishments, as well. Utilize one to cut sandwiches, sheet cake, waffles, French toast, pancakes, franks, connect wieners, lettuce, shop meat (for servings of mixed greens), quesadillas, natively constructed fudge and caramel, brownies and pie batter  The main peruse tip shares another approach to utilize a pizza cutter:
Pizza cutter: I utilize a best kitchy pizza cutter to cut natively constructed pasta, as opposed to purchasing a cutting connection for my pasta roller. Looking for life partner tip: Collaborate with another couple when you're looking for gifts for your mate. My companion and I go out to shop on a Saturday morning and call attention to every one of the things us like in the stores. That evening, she takes my better half shopping and I take hers, and we tell every one of them what his wife needed. It generally works out well - we have an extraordinary time, and keeping in mind that we're never 100 percent beyond any doubt what we're getting, we generally get presents we really like! Final measures of items: I attempt to rescue every outstanding measure of items by utilizing one of those charming little gelato scoop spoons to exchange the items to littler compartments. I've utilized void moisturizer tubs and even the additional contact focal point cases that accompany saline arrangement. Those function admirably to hold little things and extremely little measures of items. Ice-3D square plate use: I use ice-block plate to sort gems in my little girl's drawers. The plate are stackable and cheap, and you can fit a few out of a cabinet. Simply combine up hoops and put individual chains in each ice-block space to shield them from getting tangled. Thrift store coordinators: As opposed to purchasing shiny new coordinators, I purchased a bundle of different bins today at the thrift store for 50 pennies every, at that point shower painted and put a pretty lace on every one. The entire undertaking, including bushels, paint and lace, cost $5. I utilize the bins to sort out my zest pantry, and it looks incredible. Simple Easter wreath: I made a wreath enrichment for my front entryway with plastic eggs left over from Easter. I purchased a straw wreath at Michaels for $3, sparkly Easter grass at the Dollar Tree for $1 and two packs of small eggs at $1 each. At that point I hot-stuck like a madwoman. Frothing cleanser allocator: I radically decreased the sum I spend on dishwashing fluid by reusing a frothing cleanser gadget. I put one squirt of cleanser into the container, top it off with faucet water and twirl tenderly. It keeps going about seven days. I purchase dishwashing cleanser in the store-mark gallon compartment, which, at this pace, should last me around two years. Stop up free splash mops: I have the Veiled Priest clean, and like other shower mops I've utilized, stopping up is a typical issue. An extraordinary recommendation: Purchase two containers. Utilize the first for the cleaning arrangement just, and when done, evacuate the jug and store upstanding. Fill the second container with heated water and siphon it through to get out the sprayers so they don't stop up. Do this after each utilization if you don't utilize the wipe day by day. Another recommendation: Warmth 1/2 measure of vinegar in your microwave and siphon it through the clean. If it's truly obstructed, let it sit for 20 minutes with the container still in the wipe, permitting the vinegar time to eat through the stop up before siphoning it through once more. If all else fails, you can endeavor to clear the sprayers physically utilizing a stick, but be mindful so as not to prick yourself or get showered in the face with the cleaning arrangement still in the wipe. |
Archives
February 2019
Categories |
 RSS Feed
