|
Coffee and camping go connected at the hip. For me, coffee is an everyday custom, and camping without a hand-warming, steaming cup of java doesn't appear to be correct. If you need the intense smell of splendidly simmered coffee to float over your campground before anything else, utilize these tips to make your superbly brewed cup with a camping percolator. 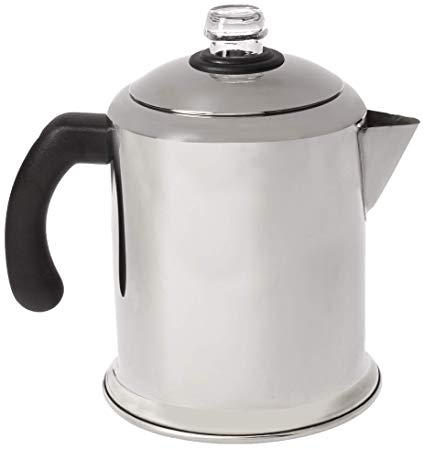 Begin with the correct percolator.
COFFEE POT 8 CUP-BLUE from GSI Outside You may not know it but rather you've seen a best electric coffee percolator before. Like the picture, these old school but valuable instruments have been a piece of American iconography since 1880. Frequently observed brewing over a flame while a cattle rustler plays his harmonica, new styles and sizes are accessible because of camping and coffee tech headways. Since space and weight are a worry when camping or exploring, remember those criteria when making your determination. What are every one of these parts? Hardened Steel Percolator Coffee Pot from Wayfair When you first utilize the percolator, every one of the parts may be a bit of befuddling. In contrast to gadgets, these infants don't accompany confounding guidelines in Taiwanese, or any directions so far as that is concerned. Here is a brisk kept running down of the parts. The percolator comprises of a pot and a vertical tube (with stand) that leads from the base to the highest point of the percolator. The basket sitting on the tube is a perforated chamber with cover. The tube and basket rest inside the pot. When assembling, ensure that the highest point of the tube and the unmistakable "bubble spot" line up. The "bubble spot", as I call it, is the place the bubbling liquid will ascend through the tube, sprinkling against within. This is the way you can tell if the pot is brewing. 1– 2– 3– 4 Camping Coffee! When you have the parts down, the real brewing is very simple. Adhere to the well-ordered directions beneath or watch the video. Either will get you to that intense smell of superbly simmered coffee drifting over your campground before anything else. 1) Fill the pot This may be two or three cups or the entire thing. Don't over fill or you'll have a chaotic situation staring you in the face. My percolator has a "fill line" within which is a convenient guide. 2) Include coffee If you are utilizing customary ground coffee, you'll have to purchase channels that accommodated your basket. However, if you utilize new coarsely ground coffee, you numerous not require a channel. This is the place trying out your percolator will be required. It took me a few times to make sense of the traps specific to my percolator. When you've made sense of the basket needs, include your ideal sum. I for the most part run with one tablespoon for every two cups of coffee and afterward include an additional tablespoon for the pot. Next, put the basket cover on and place the entire tube and basket gathering into the pot. 3) A watched pot boils Spot the pot on a stove or mesh over a flame and watch it bubble. It may take a short time if you do it over a flame, but it is critical to screen the procedure. If you are utilizing a camping stove, keep the fire at medium quality. You can't leave like drip coffee makers. After a short time it will begin to bubble. You'll know in light of the fact that the water will start to permeate to the best and you'll see it through the "bubble spot". When that begins to occur, modify the fire down on the stove or move it off the focal point of the flame. Give it a chance to keep on permeating for 10– 15 minutes. As it does this, the shade of the water in the "bubble spot" will keep on obscuring. 4) Pour and appreciate At long last, present yourself with a cup and appreciate. Take in the magnificence of nature with a cup in your grasp to battle off the chill of those astonishing mountain mornings.
0 Comments
Leave a Reply. |
Archives
February 2019
Categories |
 RSS Feed
