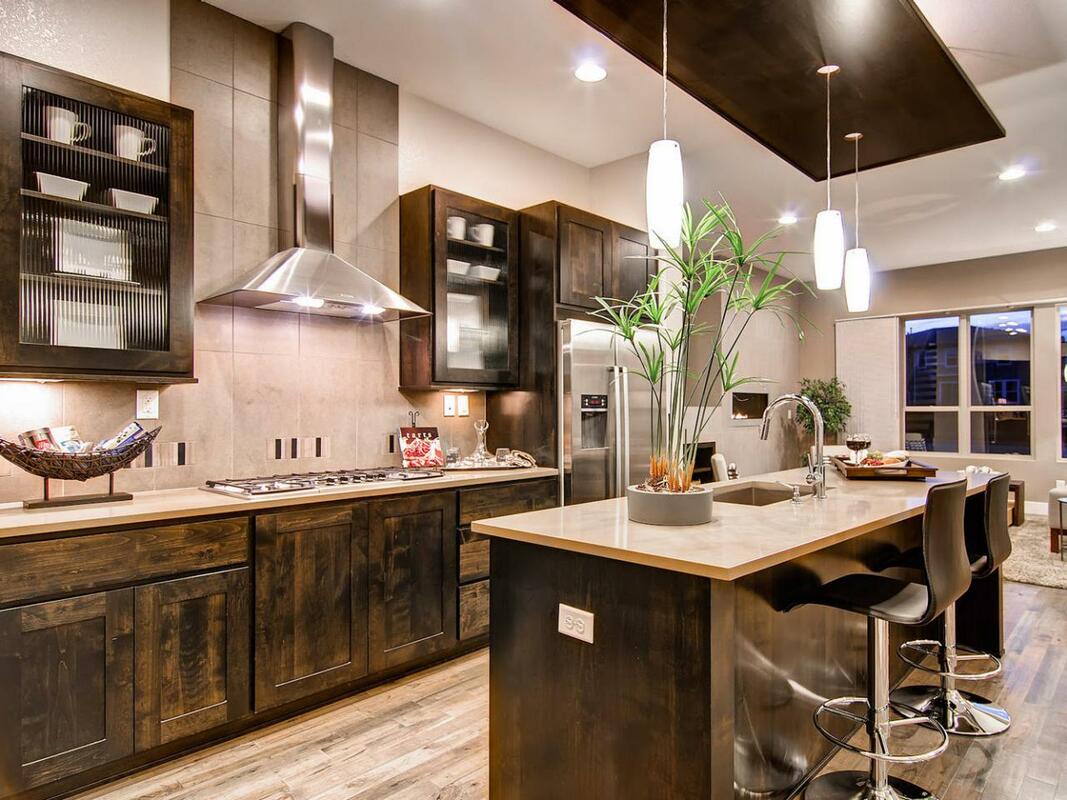
 As I began planning my kitchen, I immediately acknowledged it wasn't all reflexive home magazines and lovely backdrop tests, there are a huge amount of coordinations as well. Since this could be useful whether you're in the longing for stage or in genuine arranging stages, let me run well ordered with you. Your first goal is to consider all your useful needs. Do you want to prepare? Possibly plan for some additional counter space for those additional treat sheets. It is safe to say that you are dependably on the rundown for the most recent machines? Ensure you have additional haul out cupboards for machines. Every single incredible interesting point. I'm regularly liable of making a plunge into the pinterest rabbit opening of pretty kitchens. But making a full evaluation of what useful objectives you have helps set the tone too. This is particularly evident when it comes to spending plan. For an extremely basic and supportive approach to survey your necessities, utilize the Kitchen Goals Worksheet by HGTV. What I found is that capacity and simplicity of reach were essential to me. Did I need open racking? Some sounded great but not all. Everything beautiful in the kitchen Presently we can get to the fun part. Choosing the correct style can be extremely overpowering for anybody including me. Here are a couple of tips to get you the correct way: *Start sparing pictures. Regardless of whether it is pinterest or houzz or screen shots, begin an organizer in your telephone or PC. Incorporate every one of the top picks and soon you will see a topic. *You should need to choose the metal completion in your space first. It's anything but an essential but it will help. I realize I will blend metals on the grounds that my apparatuses will be hardened steel but I adore metal equipment. In view of this blend, it will control what tone and shading I need to add to this structure dynamic. *Get a counsel and gauge from a temporary worker or two. It will give you a thought of how much you can duplicate from your fantasy kitchen. For instance, I was interested if I could re organize the format of my genuinely little kitchen. But too many load bearing dividers kept any alternatives. I needed to stay with the first design. *Involve your family with the structure procedure. My young ladies love getting included and having a state. Travis has his suppositions as well. The kitchen is the core of the home. Getting your family included makes the space even more unique. *Go visit showrooms and investigate things direct. Contact and utilize the example installations, absorb the hues and surfaces you see. Configuration can require some investment. However now and again if you see something, in actuality, it may hit you immediately, you just never know. would you say you are prepared to get your kitchen update? Regardless of whether you aren't, stick around and take notes. I'm certain there will be triumphs and some falls flat with my undertaking. It's simply part of any sort of redesign. However, the decent part for you is that you can gain from me and ideally not rehash the oversights.
0 Comments
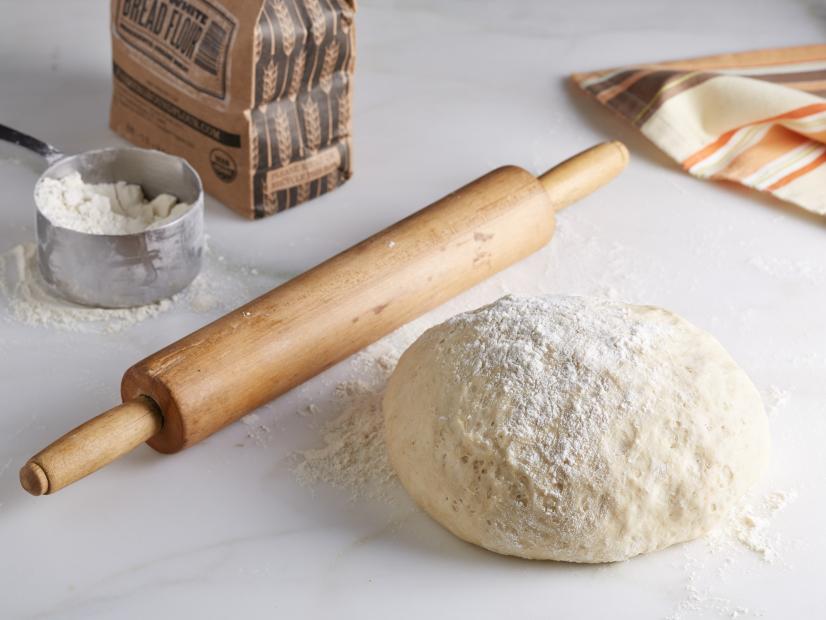 1.Combine water, sugar, and yeast in a little bowl. Let sit until foamy, around 10 minutes. This will initiate the yeast it should look frothy. If it doesn't, your yeast might be lapsed. go get some crisp yeast. 2.In a substantial bowl, join flour and fit salt. Include the yeast blend alongside the olive oil and blend until altogether joined. 3.Transfer mixture to a floured surface. Ply the batter for 5 minutes and shape into a ball. 4.Rinse out the bowl where you blended the mixture fixings and oil it with olive oil or cooking oil splash. Place the batter into the lubed blending bowl and swing to coat. 5.Cover with a warm wet towel and permit to ascend in a warm place for 1 ½ to 2 hours, or until the point when it has multiplied in size. 6.Preheat flame broil or stove as of now subtleties underneath. Punch down the batter ball down level and place on an all around floured surface. To take off, begin in the center and move towards the edges, giving a quarter turn with each forward and backward movement. Add more flour as expected to avoid staying. Take off to approximately 10 to 11 over. 7.Place the outside layer on an all around floured moveable, smooth cutting board or onto a very much floured huge pizza spatula this will assist you with transferring the pizza to a hot pizza stone once it is topped. It's vital to flour the moveable surface well so the covering doesn't stick when you exchange it. 8.Brush the outside of the covering with a little olive oil. 9.Now you're prepared for garnishes! I've discovered that this covering works best with 4 to 6 tablespoons of sauce and a couple of fixings. it's a thin outside layer, so best not to over-burden it. Whatever sauce you use, ensure it's pleasant and thick watery sauces will infiltrate the hull and cause it to go limp, which will make it harder to exchange to the stove. 10.You can prepare this formula in the broiler or on your barbecue. In any case, you ought to have a pizza stone preheated and prepared to go before you cook. The pizza stone will guarantee that your outside layer heats equitably and has a pleasant freshness. Directions for cooking your pizza in the stove Directions for conventional broiler embed pizza stone or sheet container if you don't have one into the stove and preheat to 450 degrees. You should begin the broiler warming when your batter has multiplied in size before you begin revealing the outside. This will spare time, and you don't need your fixings sitting on the uncooked hull for an all-inclusive timeframe, or it will go wet. Once everything is warmed, slide your amassed pizza straightforwardly onto the pizza stone or preparing sheet. You may require the assistance of another little spatula to manage the outside layer onto the warmed stone. Heat for 10 to 12 minutes, or to wanted doneness, turning once part of the way through cooking. I heat it until the point when the external edges are brilliant dark colored the whole distance around the hull. |
Archives
February 2019
Categories |
 RSS Feed
